Google Forms, one of the Google products, is a powerful tool that you can use to create surveys, quizzes, and registration forms. Google Forms registration forms can support business functions such as event planning, data collection, and improving operational efficiency. Businesses of all sizes use registration forms to address various aspects of their operations, including marketing and customer engagement. Registration forms can help improve different aspects of a business, such as streamlining processes and enhancing communication. Known for its user-friendly interface and seamless integration with other Google applications, it provides an efficient solution for anyone looking to organize events, collect data, or gather feedback. This article focuses on how to use Google Form registration template to create engaging and effective registration form.
Still using Google Forms? There is a better way!
involve.me is a powerful no-code solution to build dynamic forms that integrate quiz, survey, and calculator elements
Step 1: Setting Up Your Google Form
Navigate to the Google Forms website (forms.google.com) or through your Google Drive. Once on the Google Forms page:
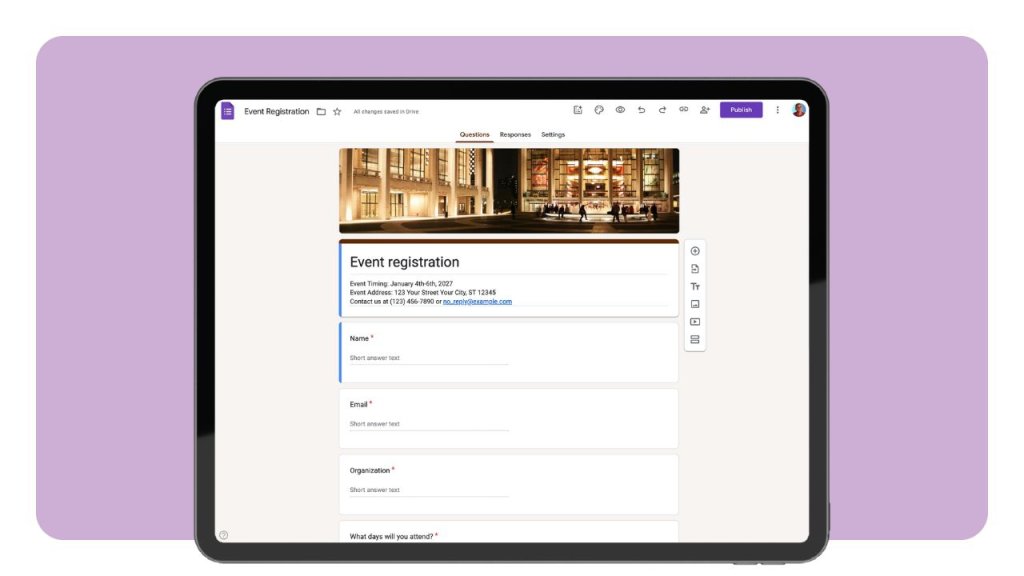
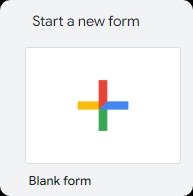
Click the blank form option to start with a fresh canvas. This approach gives you full control over the form settings and layout. The interface allows you to title your form and add a description, which guides users on the purpose of the form and what information they need to provide.
For those looking for a quicker setup:
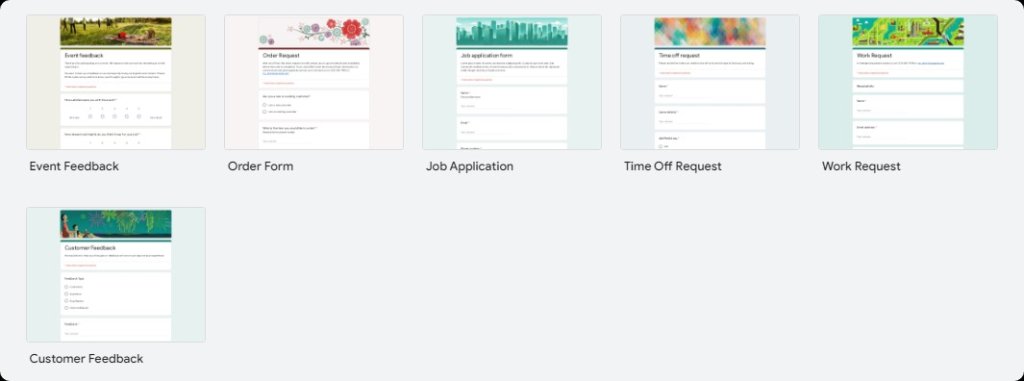
Google Forms offers pre-designed templates, including a Google registration form template which can be used as a starting point. When you select a Google form template for registration, it automatically sets up your form with standard fields and structure, which can further be customized to suit your specific needs. These templates are also suitable for course registration, making it easy to collect participant information for educational programs or training sessions.
Step 2: Designing the Google Form Registration Template
The title of your form should be concise and reflective of the event or purpose. For instance, "2024 Annual Tech Conference Registration" clearly indicates what the online registration form is for.
Below the title, the description should provide additional event details such as the date, location, and a brief summary of what attendees can expect. This helps set expectations and provides clarity to the registrants.
Adding Title and Event Detail:
Click on the form title area at the top of your new form to edit. Enter your chosen title and include a description directly below it by clicking on the form description area.

Adding Types of Questions:
Google Forms allows you to choose from various question types that can be used to collect different kinds of information:
Multiple Choice: Best for questions where only one answer is correct out of several options.
Text: Ideal for open-ended, short answer such as names or addresses.
Date: Useful for collecting specific dates from respondents, which is particularly handy for booking events or sessions.
When customizing your form, tailor the questions and required fields to meet your specific registration needs. This includes adding relevant questions, setting required fields, and choosing appropriate question types to ensure all essential information is collected.
Adding Essential Fields:
Essential fields are those that collect critical information needed for registration:
Name: Use a short text field.
Contact Details: Include form fields to collect email addresses and phone number. Use the email question type to automatically validate email format.
Address: If necessary, use a longer text field for complete addresses.
You can also include a field for participants to sign or acknowledge terms and conditions, if needed.
Participants register for the event by completing and submitting the form, ensuring all registration needs are met and any required acknowledgments are captured.
Step 3: Customizing the Form
Customize the Google form registration template, make your form engaging and align it with your event's branding, Google Forms offers several customization options.
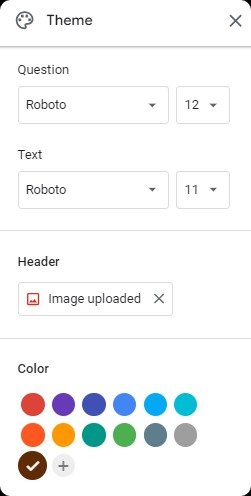
Themes: Click on the palette icon in the top right corner of the form to open theme colors. Here, you can select from a range of color schemes and font styles. Customize Theme panel: Here, you can adjust the theme color, add a header image, and select the text style to personalize your form’s appearance.
You can also incorporate your organization's branding into the form's theme for a cohesive and professional look.
Note: Organization-branded themes are only available if enabled by the administrator.Custom Colors: For more specific branding needs, you can choose a custom color for the form’s header, background, and font.
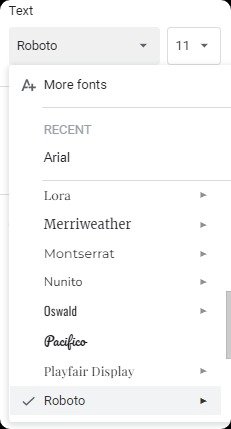
Font Style: Although choices are limited, selecting the right text style can impact the readability and feel of your form.
Pro Tip: Add section headers to divide your form into clear segments, such as personal information, event-specific questions, and payment details. This helps keep the form from becoming overwhelming and assists users in navigating through different sections smoothly.

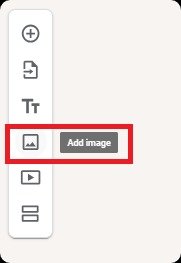
Bonus Tip: Import images or logos to enhance the form’s look. For this, click on the image icon beside the question type in the toolbar. This can be used to insert your organization’s logo at the top of the form or relevant images throughout.
Step 4: Distribute and Share Form
When you’re ready to review your form before sharing, use the preview feature by clicking the eye icon at the top right. This lets you see exactly how your form will appear to users.
Once your Google Form is ready, the next step is to share and distribute it to gather registrations.
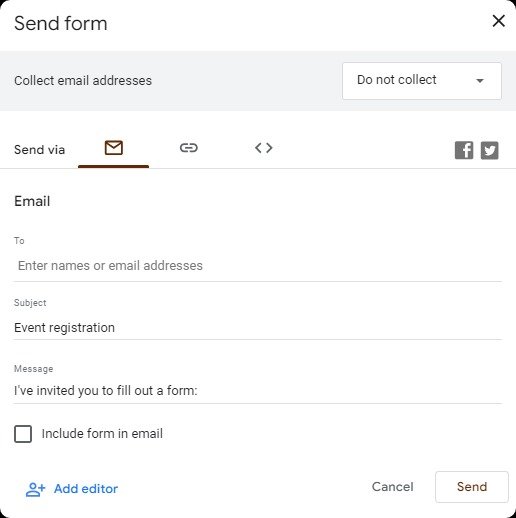
Email: You can send the form directly to potential attendees via email. Google Forms allows you to send forms as an email invite from the 'Send' button, where you can enter email addresses and include a personalized message.
Direct Link: Share a direct link of your form across social media, messaging apps, or within an organization. You can copy the form link from the 'Send' button options.
Embedding on a Website: For organizations that want the form accessible on their website, Google Forms provides HTML code that can be embedded directly into web pages. This is ideal for event registrations directly on an official event or organization site.
You can also set permissions to control who can view and fill out the form. Options include allowing anyone with the link to respond or restricting responses to users within your organization (for Google Workspace users).
The form can be filled out from any device or browser, making it accessible and user-friendly.
For advanced settings or to enable response validation, click the three vertical dots (vertical dots) menu next to each question to access additional options.
Form Security and Privacy
Let's talk Google Forms registration security!
When you're creating a registration form with Google Forms, what should be your absolute top priority? Safeguarding the privacy and security of your participants' data, of course! And the reality is, Google Forms offers a treasure trove of advanced features to help you protect sensitive information and ensure a smooth, secure registration process for your events.
So, where do you start? Enable the "Collect email addresses" option in your form settings. This not only helps you verify the identity of each participant but also ensures that you can communicate important details or updates about your event. For added security, leverage response validation on fields like email addresses or phone numbers. This feature is your best friend for preventing errors and ensuring that only valid data makes its way into your system.
When it comes to sharing your form, you'll want to control access by using the "Anyone with the link" setting or restrict access as needed.. This clever approach lets you distribute your registration form to a targeted audience while keeping it private from the general public. And if you're part of an organization using Google Workspace? You can restrict access even further to users within your domain!
Now, let's talk about building trust because transparency is key to building trust with your participants. Customize your form's theme to include your organization's branding, and add a clear privacy policy or terms of service in the form description. This simple step informs users about how their data will be used and protected throughout the registration process.
This gives you peace of mind and helps you focus on what really matters delivering a successful event that your participants will remember!
Step 5: Managing Event Registration Responses
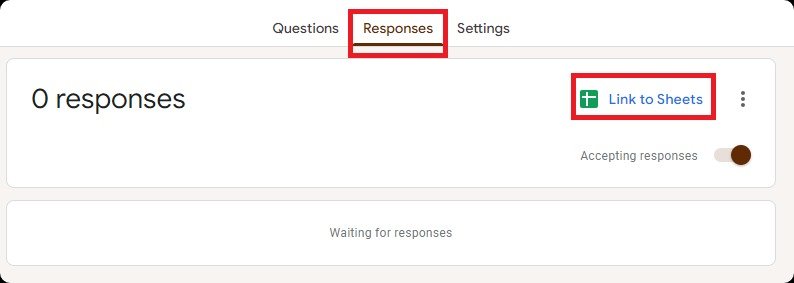
Responses to your Google Form are collected in real-time and can be viewed under the 'Responses' tab within the form. You can see summary charts and individual responses. To stay updated, enable notifications so you receive alerts whenever new registrations are submitted.
Google Forms allows you to download responses into a spreadsheet directly from the 'Responses' tab. Click on the green Sheets icon to create a new spreadsheet or link the responses to an existing one.
Google Form Event Registration Template Alternative: involve.me
While Google Forms is a widely used tool for creating various online forms, including registration forms, there is a better alternative that offers advanced features, enhanced analytics, and superior customization: involve.me. This form builder is designed for users looking for more than just basic form, providing a richer, more interactive customer experience and deeper insights into data collection. When organizing an event, having a detailed plan is crucial for successful registration and smooth event execution.

involve.me stands out from Google Forms by offering a wide array of advanced features, such as:
Logic Jumps and Conditional Logic: These features enable you to guide respondents through different paths based on their answers. This creates a personalized experience for each user, which is particularly useful for complex forms.
Payment Integration: Allowing users to directly integrate payment gateways into your forms, facilitating seamless payments and transactions within the registration process for events or services.
Ability to Segment and Track: involve.me provides the ability to segment attendees, track registrations, and support exclusive activities, enhancing user experience and event management.
Detailed Reporting: Gain insights into user behavior, completion rates, and detailed analytics on each question.
Integration: The platform supports integration with popular marketing tools and CRM systems, such as Mailchimp, HubSpot, and Salesforce. This helps in automating workflows and better managing customer data.
Branding Options: Customize forms to match your brand’s look and feel with specific fonts, colors, and layouts, which is more extensive than what Google Forms offers.
Rich Media Support: Easily embed videos, images, and GIFs, which can make your forms more engaging and visually appealing.
Creating Event Registration Forms Using involve.me
For those looking to create online forms for registration, involve.me offers free registration templates that are fully customizable to meet the needs of any event type. Whether you're organizing a small workshop, a large conference, or a virtual event, choose a template that fits the theme and tone of your event. Each template is designed with conversions in mind, ensuring you capture all the necessary attendee information effectively.
No need for technical skills, with involve.me's user-friendly web based interface, you can easily create and manage your event registration form or any online form using a computer by simply dragging and dropping the elements you need.

