Whether you want to collect user-generated content for an online contest, CVs from candidates or detailed feedback about your product, it's important to know how to quickly craft a file upload form.
Ideally, you should have a form that you can share as a link or embed into your website for users to engage with it when they need to.
In this article you will learn how to do exactly that. Here's a step-by-step guide to help you set up such a form:
Step 1: Choose Your Tool
There're a lot of tools out there - Google Forms, JotForm, TypeForm. If you need a quick fix, user friendly interface, and advanced analytics, it's better to go with an AI survey generator that has many features available for free.
In this guide, we will show you how to create a custom form using involve.me file upload form template.
No coding skills are needed.
Go to the involve.me website and log in to your account. If you don't have an account, sign up for one.
Step 2: Create a New Project
Once you log in into your account, you will find a template library. You can either browse through templates and choose the one you want to customize or create a project from scratch.
If you only need to collect different types of files, I'd suggest choosing the 'Thank You' project type out of the three available ones.
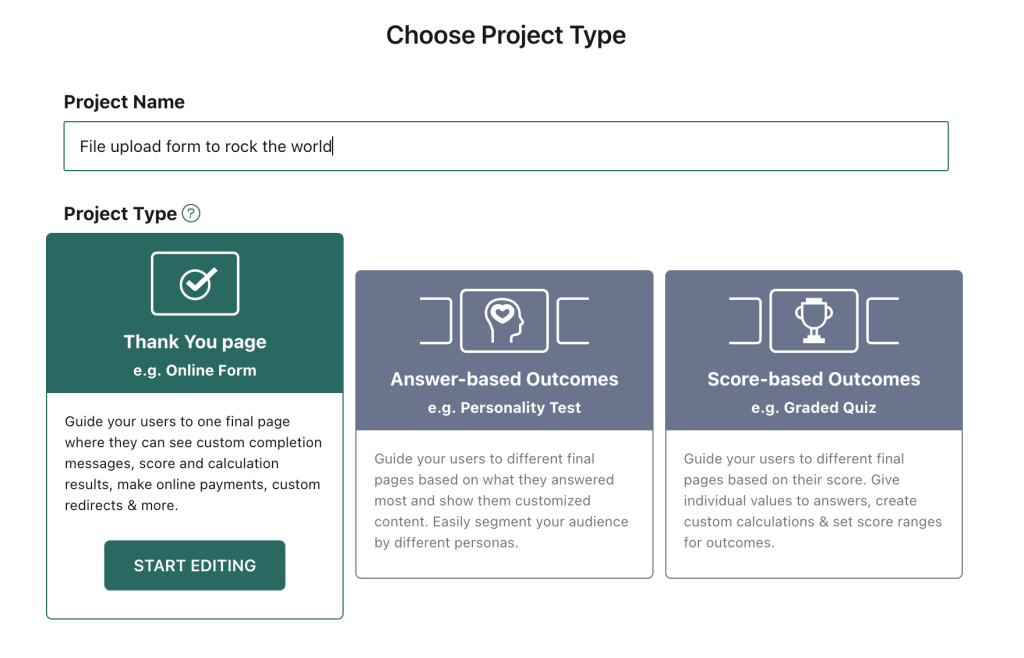
involve.me project types
You will find all content elements on your right. Drag and drop elements onto the canvas to create a form. Use the search bar to find elements needed for your project.
Recommended content elements for creating a file upload form:
1. Heading
2. Contact Form (collect name, email address, and other details
3. Page timer (create a sense of urgency)
4. Checkbox question (data processing agreement)
5. File Upload option
Use 'File Upload' content elements and customize it by:
✅ Adding your question text
✅ Making the file upload mandatory
✅ Choosing the number of files (it's now possible up to 10 files)
✅ Specifying file format and maximum file size
✅ Adding a hint. Here's where it will be located in the form:
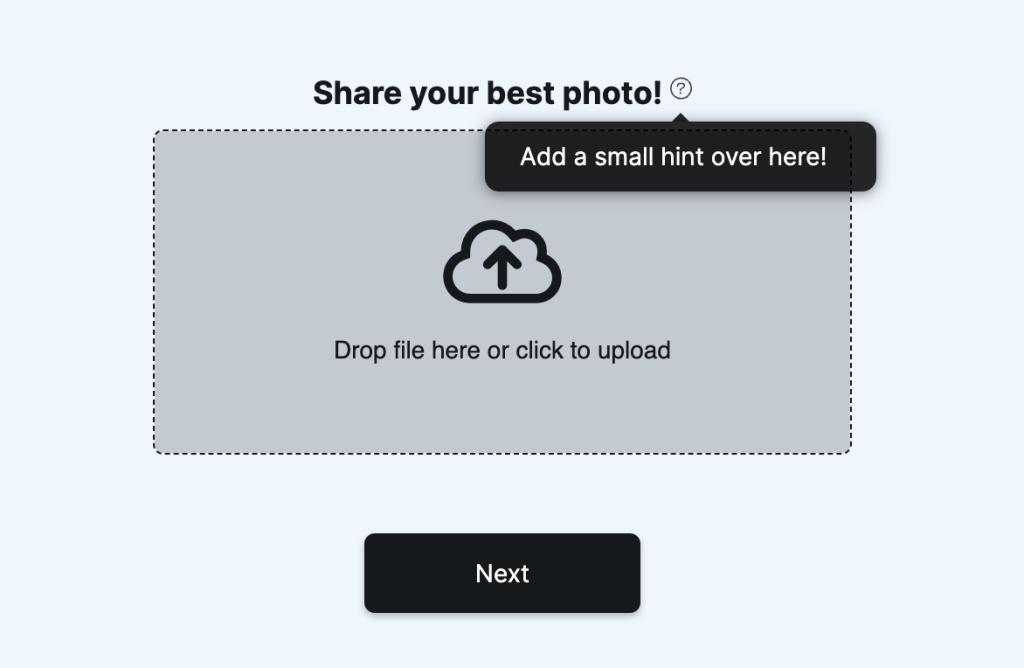
Keep your branding consistent. Customize the form's design by selecting colors, fonts, and custom images.
Here's my 2-page online form I created with involve.me form builder:
Pro Tip: If your upload form is part of a larger survey or quiz, you can use logic to control the flow based on participants' responses. involve.me provides easy-to-use logic features for this purpose.

Step 3: Add a Custom Email
Once your users have uploaded their files through your custom form, it's essential to maintain a smooth and personalized communication process. Sending out custom email notifications can be a great way to acknowledge their form submission.
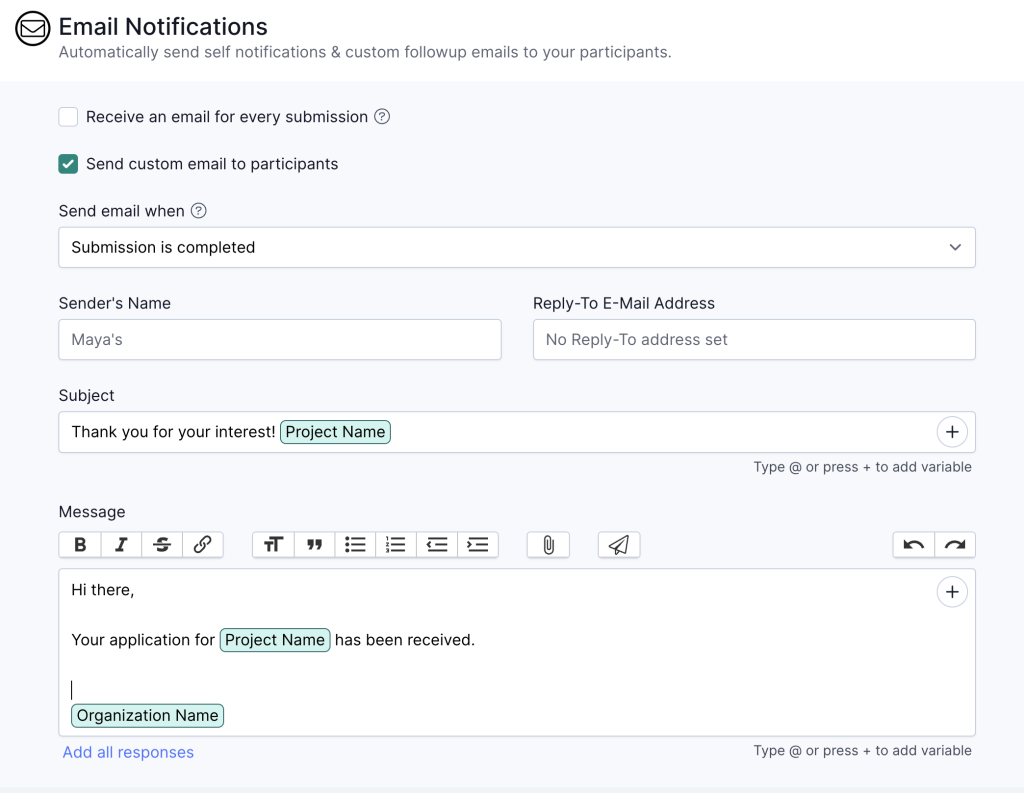
Go to 'Configure' --> 'Email Notifications'
Choose the option 'Send custom email to participant' and write the confirmation message and email subject.
Here you can see the default message:
Step 4: Integrate Your Form With Other Tools
Consider integrating your involve.me upload form with marketing tools.
CRM integration streamlines user data, email marketing tools offer personalized automation, and custom redirects enhance user experience. You can connect your form to Notion, Google Analytics, Google Sheet, Marketo, HubSpot, and many other tools to store and analyze data, potentially allowing for follow-ups with newly collected leads.
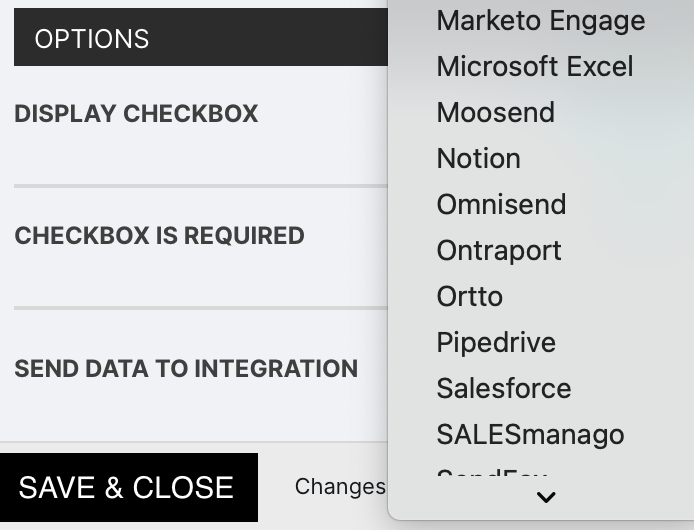
While involve.me has numerous native integrations, you can also link other tools using Zapier. Check out a new article about top 10 involve.me integrations for marketing professionals.
Step 5: Test Your Form
Before launching your project, it's crucial to test the upload file form to ensure that it functions correctly. Try uploading different file types and sizes to confirm that it works as intended.
Step 6: Share Your Online Form
Once you're satisfied with your upload file form and the overall project, click the "Publish" button to make it accessible to participants.
You have a few options of sharing it with your audience. You can either share it as a link, as a pop up, or embed it into your website. To embed the for, go to 'Share and Embed'.
Then choose the embedding option:

Step 7: Collect Form Responses
As participants complete your upload file form, you can monitor and manage file submissions in your involve.me dashboard.
You can also access metrics such as average response time and drop-offs, which can be especially helpful if you include additional questions for participants.
Also, you can review demographic data and all submitted answers/uploads. Be sure to explore involve.me's advanced settings and AI Insights, which generate a comprehensive summary and analysis of all responses.
Using AI Insights, we, the team at involve.me, managed to analyze 12,193 customer review responses in less than a minute using our own tool. I've recently published a case study about it.
Final Words
In conclusion, creating an upload file form using involve.me allows you to effortlessly collect files for a range of applications, including job application forms, surveys, or contest entries. Regardless of your coding level our intuitive form builders simplify the process. By following these steps, you can seamlessly integrate file upload fields and specify file formats to meet your unique requirements.
Check out other templates to create more interactive content for your website:
Create Your Own Forms
Start with a customisable template
Recruiting Form for Solar Panel Installation Company Template
B2C Lead Magnet Template
Request Collection Form for Real Estate Template
Whitepaper Download Template
Registration Form Template
Newsletter Signup Form for Insurance Template


